
Kia EV6: General Information
Kia EV6 (CV/CV1A) 2022-2026 Workshop Manual / General Information
Contents:
- Single-Use Parts
- High Voltage System General Safety Information and Caution
- High Voltage Shut-off Procedures
- Important Safety Notice
- Identification Numbers
- Warning And Caution Labels
- Lift And Support Points
- Towing
- Basic Service Symbols
- General Service Information
Single-Use Parts
| Single-Use Parts |
Non-reusable parts (Single-Use Parts)
Workshop manual provides “Components and Components Location” which can be used to identify “Non-reusable parts”.
When repairing a vehicle, Non-reusable parts such as fasteners, gaskets, washers, clips and garnishes must be
replaced. Kia Non-reusable parts are designed to be installed only once.
Before working on a vehicle, check “Components and Components Location” to find the non-reusable parts in a
system.
※ Symbol of Non-reusable parts
|
Symbol |
Meaning |
|
|
Do not reuse the part. Replace with a new one. |

※ Example of “Components and Components Location”

High Voltage System General Safety Information and Caution ➤
High Voltage Shut-off Procedures
High Voltage Shut-off Procedures
| High Voltage Shut-off Procedures |
|

High Voltage Component : Battery System Assembly (BSA), motor assembly, inverter assembly, high voltage
junction box, power cable, etc.
|

| 1. |
Check the Battery Management Unit (BMU) weld flag with the KDS.
(Data Analysis → Battery Management System (BMS) → BMU Weld Flag)
|
| 2. |
Open the front trunk (A).
|

| 3. |
Open the low voltage (12 V) battery service cover (A).
|

| 4. |
Turn the POWER OFF, separate the low voltage (12 V) battery ( - ) terminal (A).
|

| 5. |
Disconnect the service interlock connector (A).
|


| 6. |
Remove the front under cover.
(Refer to Motor and Reduction Gear System - "Front Under
Cover")
|
| 7. |
Remove the high voltage battery cover (A).
|

| 8. |
Disconnect the front high voltage junction box power cable (A).
|


| 9. |
Remove the center floor rear under cover.
(Refer to Motor and Reduction Gear System - "Rear Under
Cover")
|
| 10. |
Disconnect the Integrated Charge Control Unit (ICCU) connector (A).
|


| 11. |
Disconnect the rear high voltage junction box power cable (A).
|

| 12. |
Measure the voltage between the high voltage power connector and high voltage battery terminal to check
whether the high voltage is shut-off.
|


Important Safety Notice
General Information
| How to Use This Manual |
Proper service methods and repair procedures are essential for safe, reliable operation of all electric vehicles as
well as personal safety of the operator. The service procedures and descriptions in this shop manual provide general
directions for a service and repair.
Procedure, techniques, tools, and parts for service including the skill of the technician vary. It is impossible to
provide advice or caution as to each case in this manual.
Accordingly, anyone who intends to use a replacement part, service procedure, or tool, which is not recommended by
the vehicle manufacturer, must first assure thoroughly that neither their personal safety nor the safe operation of
the vehicle will be first jeopardized by the replacement part, service procedure, or tool they select.
| Important Safety Information Types |
Reminds you be very careful for those works may have high possibility of death or serious injury.
|

Reminds you be very careful for those works may have possibility of death or serious injury.
|
Reminds you be very careful for those works may have possibility of personal injury.
|

Gives you information that will prevent you from making errors that could damage the vehicle.
|
Gives you some information that will help you to complete the repair or procedure.
|
| Precautions for Service |
|
| • |
You must take the high voltage shut-off procedure before starting any work related with the high voltage or
electrical system components in order to prevent fire or electric shock.
|
| • |
Do not smoke during work and do not work near fire hazards like heaters.
|
| • |
Keep a fire extinguisher nearby.
|
| • |
Use a lift designed for the vehicle when working underneath the vehicle.
Refer to the lift points and precautions when using a vehicle lift.
(Refer to General Information - "Lift and Support Points")
|
| • |
It is better not to work if you are feeling sick. The risk of injury increases and the quality of the
vehicle after delivery to customer cannot be guaranteed.
|
| • |
When handling harmful substances and machine tools, wear appropriate goggles, gloves and cloth.
|
| • |
If hair, clothing, or jewelry is caught into the machine, it can cause serious injury. Do not wear ties,
scarves, or necklaces and tie long hair behind your head when working.
|
| • |
Do not reuse worn or deformed fasteners, nuts and bolts. Some parts are prohibited for reuse. Follow
instructions for those reuse prohibit parts in the manual.
|
| • |
Friction parts such as brake pads and clutch discs may contain asbestos fibers. Be careful not to inhale
asbestos fibers when grinding, sanding.
|
| • |
Always keep the draining fuel, oil, brake fluid on a suitable container during work.
|
| • |
The air conditioning (A/C) system is filled with harmful refrigerants. The A/C system should only be
serviced by certified technicians using approved refrigerant recovery/recycling equipment in the correct
manner.
|
Identification Numbers
General Information
| Identification Numbers |
Vehicle Identification Number (VIN)
The VIN is located under the front passenger seat.


| 1. |
World Manufacturer Identifier (WMI)
|
| 2. |
Vehicle Line
|
| 3. |
Vehicle Line - Detail
|
| 4. |
Body & Cabin Type
5XY
|
| 5. |
Restraint system, Brake system
|
||||||||||||||||||||||||||||||||||||||||||||||||||||||||||||||||||||||||||||||||||||||||||||||||||||||||||||||||||||||||||||||||||||||||||||||
| 6. |
Motor Type
|
| 7. |
Check digit
|
| 8. |
Production year (Except I,O,Q,U,Z)
|
| 9. |
Manufacturing Plant
|
| 10. |
Vehicle production sequence number
- 000001 ~ 999999
|
Motor Number
| Front Motor |

| Rear Motor |

| 1. |
Motor model
- EM : EV
|
| 2. |
Motor type
- 07 : 73kW
- 17 : 160kW
- 27 : 270kW
|
| 3. |
Production year (Except I,O,Q,U,Z)
S : 2025, T : 2025, V : 2027, W : 2028, X : 2029
|
| 4. |
Production month
- 1~ 9 : January - September
- A ~ C : October - December
|
| 5. |
Production day
- 1~ 9 : 1st - 9th
- A ~ Y : 10th - 31st (I, O, Q excluded)
|
| 6. |
Motor production sequence number
- 001 ~ Z99
- A : 10 ~ Z : 32
- Z99 : 3299
|
| 7. |
Vehicle line
- 1
|
| 8. |
Manufacturing Plant
- J : Chungju (Korea)
- C : China
- D : Daegu (Korea)
|
Color code
|
Code |
Item |
Color |
| SWP |
Snow White Pearl |
|
| ABP |
Aurora Black Pearl |
|
| B4U |
Gravity Blue |
|
| CR5 |
Runway Red |
|
| AGT |
Interstella Gray |
|
| DU3 |
Yacht Blue |
|
|
G4E |
Deep Forest Green |
|
|
KLM |
Moonscape matt gray |
|
|
GLB |
Glacier |
|


Warning And Caution Labels
General Information
| Warning And Caution Labels |

| 1. Battery caution label 2. Pressure cap caution label |
Auxiliary Battery Caution Label

| A. |
No flames
|
| B. |
Wear eye protection
|
| C. |
Prohibit access of children
|
| D. |
Caution battery electrolyte
|
| E. |
Information manual
|
| F. |
Explosion caution
|
| G. |
Waste recycling
|
Precautions for handling batteries
You must be aware of general safety precautions when installing, re-charging or handling the battery.
Failure to handle the battery may result in explosions, suffocation or addiction.
|
How to store the battery
|
Handling and storage |
Store the battery in a cool, dry place and keep away from direct sunlight.
|
||||||||||||
|
Vehicle parked for an extended period of time |
Disconnect the battery from the vehicle and charge the battery as much as possible. Store the fully charged battery in cool and dry area. If the battery is fully charged, it can be stored below 0 ºC (32 ºF ), but if not it can be frozen. |
||||||||||||
|
Regular operating vehicle |
Check if the battery is leaking, damaged or cleaned regularly. Check the charging status of the battery regularly. Inspect the vehicle when the battery is discharged or overcharged. If the battery performance deteriorates, replace the battery. |
Lift And Support Points
General Information
| Lift Points And Precautions For Lift |
Become familiar with the following instructions below when using lift.
| • |
Keep the vehicle empty and remove additional weight when lifting with lift. If it is inevitable, be careful
not to exceeds the maximum weight of the lift.
|
| • |
Use the counter weight or install the safety jack to prevent the vehicle from falling when removing heavy
parts such as motor or battery.
|
| • |
Install the rubber block to prevent the lift points from damage.
|
| • |
Before operating the lift, make sure there is no tool, parts, equipment, or people under the vehicle.
|
| • |
Follow the safety instructions in the manual provided by the lift manufactuer.
|
| • |
Install jacks using only provided lift points in this manual.
[Lift Points]
|

[Precautions for 2 Post Lift]

| 1. |
Place the vehicle on the lift to balance the front, rear, left and right sides of the vehicle slowly so
that the vehicle is centered on the lift.
|
| 2. |
For safety, lift the vehicle that it slightly falls off the ground, and then shake the vehicle to check the
support condition.
|
| 3. |
If safety checked, lift the vehicle.
|
[Precautions for 4 Post Lift]

| 1. |
Place the vehicle on the lift to balance the front, rear, left and right sides of the vehicle slowly so
that the vehicle centered on the lift.
|
| 2. |
Use wheel chocks to prevent vehicle moved accidentally.
|
[Precautions for Scissor Lift]

| 1. |
Be careful not to let the lift interfere with underbody parts when lifting the vehicle.
|
[Precautions for Floor Jack]

| 1. |
Use wheel chocks to prevent vehicle moved accidentally.
|
| 2. |
Do not install the floor jack except for the front subframe, rear crossmember, and lift points.
|
Towing
General Information
| Towing |
Be sure to follow the procedures below when towing.
|
Towing hook
Towing hook can be installed at the front and back of the vehicle.
To prevent vehicle body damage, connect the towing hook when towing.
|
| 1. |
Remove the cover by pressing the bottom of the bumper cover hole.
[Front]
[Rear]
|


| 2. |
Insert the towing hook by turning it clockwise into the hole until it is fully secured.
[Front]
[Rear]
|


How to tow with tow-truck
These three methods can be used to tow for general vehicles. However, the sling-type towing method is not
recommended as it may damage the vehicle except for the emergency situation.
| – |
Flatbed towing
A method of towing by loading a vehicle behind a tow truck.
It is the safest and best way to tow a electric vehicle.
|
| – |
Under lift towing
A method of lifting the drive shaft wheel of the vehicle to the tow truck and making the opposite wheel
touch the floor or towing using auxiliary equipment.
* For electric vehicles, be sure to use auxiliary equipment such as dolly to prevent wheels from touching
the ground.
|
| – |
Sling type towing
A method of towing using a tow truck's hooked chain.
Sling type towing is not recommended as it can seriously damage the vehicle's suspension and body.
|
|

Basic Service Symbols
General Information
| Basic Service Symbols |
These symbols indicate the part to apply such materials during service.
|
Symbol |
Meaning |
|
|
Do not reuse the part. Replace with a new one. |
|
|
Apply grease to the part. |

General Service Information ➤


Other information:
Used high voltage battery system storage, transportation, disposal guide • When working on the high voltage system, the work should be performed by technicians who have completed the relevant training.Kia EV6 (CV/CV1A) 2022-2026 Workshop Manual: Instrument cluster
1. Speedometer MPH, km/h Displays the current driving speed of the Kia EV6 in either kilometers per hour (km/h) or miles per hour (mph), depending on the selected regional settings. The digital speedometer of the Kia EV6 is designed for clear visibility and quick driver recognition under various driving conditions.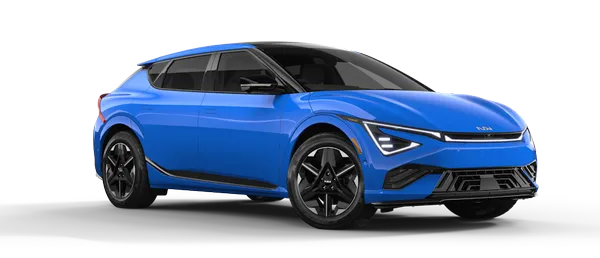
Contents
- Single-Use Parts
- High Voltage System General Safety Information and Caution
- High Voltage Shut-off Procedures
- Important Safety Notice
- Identification Numbers
- Warning And Caution Labels
- Lift And Support Points
- Towing
- Basic Service Symbols
- General Service Information
Categories
- Manuals Home
- Kia EV6 Owners Manual
- Kia EV6 Service Manual
- Questions & Answers
- Video Guides
- Useful Resources
- New on site
- Most important about Kia EV6
- Privacy Policy

Copyright © 2026 Kia EV6 Manuals ⏱ 0.0257