
Kia EV6: Body (Interior / Exterior / Electrical) / Body Side Molding
Kia EV6 (CV/CV1A) 2022-2026 Workshop Manual / Body (Interior / Exterior / Electrical) / Body Side Molding
Contents:
- Components and Components Location
- A Pillar Garnish Removal and Installation
- Door Garnish Removal and Installation
- Emblem Removal and Installation (Rear)
- Fender Garnish Removal and Installation
- Front Trunk Removal and Installation
- Quarter Fixed Glass Removal and Installation
- Quarter Garnish Removal and Installation
- Rear Spoiler Removal and Installation
- Roof Side Molding Removal and Installation
- Side Sill Molding Removal and Installation
- Tailgate Garnish Removal and Installation
- Wheel Guard Removal and Installation
Components and Components Location
| Component |
| Body Side Molding |

| 1. Roof Side Molding 2. Front Wheel Guard 3. Fender Garnish 4. Rear Wheel Guard 5. Quater Garnish 6. Front Door Garnish |
7. Rear Door Garnish 8. Side Sill Molding 9. Rear Spoiler 10. C-Pillar Garnish 11. A Pillar Garnish |
A Pillar Garnish Removal and Installation
| Removal |
|

| 1. |
Remove the A pillar garnish (A) from the top part (B).
|


| Installation |
|
| 1. |
Install in the reverse order of removal.
|
Door Garnish Removal and Installation
| Removal |
|
Front Door Garnish
| 1. |
Remove the garnish (A).
|


Rear Door Garnish
| 1. |
Remove the garnish (A).
|


| Installation |
|
| 1. |
Install in the reverse order of removal.
|
Emblem Removal and Installation (Rear)
| Emblem attached area |
| • |
Standard of measurement : From the top end of tailgate to the top of the emblem (Center of vehicle)
|
| • |
Length considering curved surface : 122 mm
|


| Removal |
|
|

| 1. |
Remove the emblem.
|
| Installation |
|
| 1. |
Mark the center of the emblem.
|

| 2. |
Measure the distance of the curved surface from the reference point and attach the emblem to the vehicle
center.
|

| 3. |
Use a tool such as a roller to attach it closely to the vehicle body after attaching the emblem.
|
| Note |
| 1. |
The following products can be utilized to accurately determine the location of the emblem attachment.
|


| 2. |
The center from both ends of rear lamp is the center of the vehicle.
|

Fender Garnish Removal and Installation
| Removal |
|
| 1. |
Remove the front wheel guard.
(Refer to Body Side Molding - "Wheel Guard")
|
| 2. |
Remove the apron cover.
(Refer to Fender - "Apron Cover")
|
| 3. |
Remove the fender garnish (A).
|


| Installation |
|
| 1. |
Install in the reverse order of removal.
|
Front Trunk Removal and Installation
| Removal |
|
| 1. |
Turn the POWER OFF, separate the auxiliary battery (12 V) ( - ) terminal, and disconnect the high voltage
service interlock connector.
|


| 2. |
Disconnect the front trunk connector (A).
|

| 3. |
Remove the bolts (A).
|

| 4. |
Remove the front trunk (A) after removing the bolts.
|

| Installation |
|
| 1. |
Install in the reverse order of removal.
|
Quarter Fixed Glass Removal and Installation
| Removal |
|
| 1. |
Remove the rear pillar trim.
(Refer to Interior Trim - "Rear Pillar Trim")
|
| 2. |
Remove the nuts (A).
|

| 3. |
Remove the quarter fixed glass (A).
|

| Installation |
|
| 1. |
Install in the reverse order of removal.
|
Quarter Garnish Removal and Installation
| Removal |
|
| 1. |
Remove the quarter garnish (A).
|


| Installation |
|
| 1. |
Install in the reverse order of removal.
|
Rear Spoiler Removal and Installation
| Removal |
|
| 1. |
Turn the POWER OFF, separate the auxiliary battery (12 V) ( - ) terminal, and disconnect the high voltage
service interlock connector.
|
| 2. |
Remove the tailgate side trim.
(Refer to Tailgate - "Tailgate Trim")
|
| 3. |
Remove the rear spoiler (A) by removing the nuts after disconnecting the connector (B).
|


| Installation |
|
| 1. |
Install in the reverse order of removal.
|
Roof Side Molding Removal and Installation
| Removal |
|
| 1. |
Remove the roof side molding (A).
|


| Installation |
|
| 1. |
Install in the reverse order of removal.
|
Side Sill Molding Removal and Installation
| Removal |
|
| 1. |
Remove the side sill molding (A) after removing the screw.
|


| Installation |
|
| 1. |
Install in the reverse order of removal.
|
Tailgate Garnish Removal and Installation
| Removal |
|
| 1. |
Remove the tailgate lower trim.
(Refer to Tailgate - "Tailgate Trim")
|
| 2. |
Remove the garnish (A) after removing the nuts.
|


| Installation |
|
| 1. |
Install in the reverse order of removal.
|
Wheel Guard Removal and Installation
| Removal |
|
Front Wheel Guard
| 1. |
Remove the front wheel and tires.
(Refer to Suspension System - "Wheel")
|
| 2. |
Remove the wheel guard (A) after removing the fasteners.
|

Rear Wheel Guard
| 1. |
Remove the rear wheel and tires.
(Refer to Suspension System - "Wheel")
|
| 2. |
Remove the wheel guard (A) after removing the fasteners.
|

| Installation |
|
| 1. |
Install in the reverse order of removal.
|


Other information:
Canceled manually The Smart Regeneration System temporarily turns off and the AUTO regenerative braking indication disappears from the Kia EV6 cluster display. Pull and hold the right-side paddle shifter for longer than 0.5 second. Canceled automatically The vehicle is shifted into N (Neutral), R (Reverse), or P (Park).While parking, the rear view of the Kia EV6 Surround View Monitor is activated under the following conditions: The gear is in P (Park), N (Neutral), or D (Drive), the Kia EV6 speed is below 6 mph (10 km/h), and the Parking/View button (1) is pressed. The driver can then press the view switching button (2) to select the rear camera view.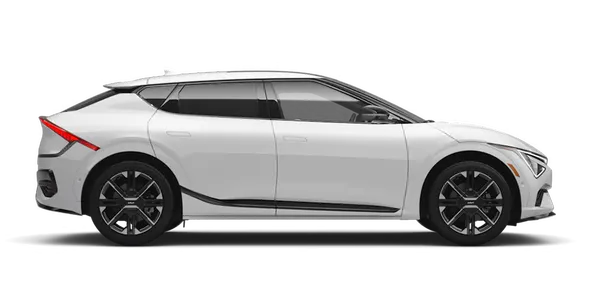
Contents
- Components and Components Location
- A Pillar Garnish Removal and Installation
- Door Garnish Removal and Installation
- Emblem Removal and Installation (Rear)
- Fender Garnish Removal and Installation
- Front Trunk Removal and Installation
- Quarter Fixed Glass Removal and Installation
- Quarter Garnish Removal and Installation
- Rear Spoiler Removal and Installation
- Roof Side Molding Removal and Installation
- Side Sill Molding Removal and Installation
- Tailgate Garnish Removal and Installation
- Wheel Guard Removal and Installation
Categories
- Manuals Home
- Kia EV6 Owners Manual
- Kia EV6 Service Manual
- Questions & Answers
- Video Guides
- Useful Resources
- New on site
- Most important about Kia EV6
- Privacy Policy

Copyright © 2026 Kia EV6 Manuals ⏱ 0.019