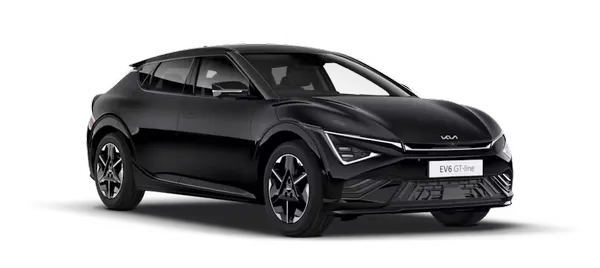
Kia EV6: Body (Interior / Exterior / Electrical)
Contents:
Single-Use Parts
Non-reusable parts (Single-Use Parts)
Workshop manual provides “Components and Components Location” which can be used to identify “Non-reusable parts”.
When repairing a vehicle, Non-reusable parts such as fasteners, gaskets, washers, clips and garnishes must be
replaced. Kia Non-reusable parts are designed to be installed only once.
Before working on a vehicle, check “Components and Components Location” to find the non-reusable parts in a
system.
※ Symbol of Non-reusable parts
Symbol
|
Meaning
|
|

|
Do not reuse the part. Replace with a new one.
|
※ Example of “Components a470nd Components Location”

High Voltage Shut-off Procedures
High Voltage Shut-off Procedures
| High Voltage Shut-off Procedures |
|
•
|
When working on the high voltage system, the work should be performed by technicians who have
completed the relevant training. A lack of understanding of the high voltage system can lead to
serious accidents due to electric shock or short circuit.
|
|
•
|
When working on the high voltage system or related components, be sure to observe and be aware of
the "Safety Precautions, Cautions and Warnings". If not, it may cause serious accidents due
to electric shock or short circuit.
|
|
•
|
When working on high voltage system, make sure to check the Personal Protective Equipment (PPE) and
high voltage shut-off procedure.
|
|
|
High Voltage Component : Battery System Assembly (BSA), motor assembly, inverter assembly, high voltage
junction box, power cable, etc.
|
| 1. |
Check the Battery Management Unit (BMU) weld flag with the KDS.
(Data Analysis → Battery Management System (BMS) → BMU Weld Flag)
|
Refer to the KDS screen for operating conditions and details.
|
|
| 2. |
Open the front trunk (A).

|
| 3. |
Open the low voltage (12 V) battery service cover (A).

|
| 4. |
Turn the POWER OFF, separate the low voltage (12 V) battery ( - ) terminal (A).
Tightening torque :
7.8 - 9.8 N·m (0.8 - 1.0 kgf·m, 5.8 - 7.2 lb·ft)
|

|
| 5. |
Disconnect the service interlock connector (A).

|
•
|
Wait more than 5 minutes for capacitor of the high voltage battery system to be discharged
completely.
|
|
•
|
When working on a vehicle during discharging the capacitor, it can cause an electrical
shock or injury, so follow the manual.
|
|
|
The service interlock connector cannot be completely removed.

|
|
| 6. |
Remove the front under cover.
(Refer to Motor and Reduction Gear System - "Front Under
Cover")
|
| 7. |
Remove the high voltage battery cover (A).
Tightening torque :
7.8 - 11.8 N·m (0.8 - 1.2 kgf·m, 5.8 - 8.7 lb·ft)
|

|
| 8. |
Disconnect the front high voltage junction box power cable (A).

|
How to disconnect the connector
| 1) |
Release the locking clip (A) by pulling it.
|
| 2) |
Disconnect the connector by pushing the lever (A) in the direction of the arrow while
pressing the locking clip (B).
|

|
|
| 9. |
Remove the center floor rear under cover.
(Refer to Motor and Reduction Gear System - "Rear Under
Cover")
|
| 10. |
Disconnect the Integrated Charge Control Unit (ICCU) connector (A).

|
How to disconnect the connector
| 1) |
Release the locking clip (A) by pulling it.
|
| 2) |
Disconnect the connector while pressing the locking clip (B).

|
|
|
| 11. |
Disconnect the rear high voltage junction box power cable (A).

|
How to disconnect the connector
| 1) |
Release the locking clip (A) by pulling it.
|
| 2) |
Disconnect the connector by pushing the lever (A) in the direction of the arrow while
pressing the locking clip (B).
|
|
|
| 12. |
Measure the voltage between the high voltage power connector and high voltage battery terminal to check
whether the high voltage is shut-off.
30 V or less : Normal cut off high voltage circuit
Above 30 V : Fault on high voltage circuit
|
| (1)
|
Measure the voltage between the high voltage power connector positive ( + ) terminal and negative (
- ) terminal.

|
| (2)
|
Measure the voltage between the high voltage battery positive ( + ) and negative ( - ) terminal.

|
| (3)
|
Measure the voltage between the high voltage battery positive ( + ) terminal and ground.

|
| (4)
|
Measure the voltage between the high voltage battery negative ( - ) terminal and ground.

|
| (5)
|
Measure the voltage between the rear high voltage battery positive ( + ) and negative ( - )
terminal.

|
| (6)
|
Measure the voltage between the rear high voltage battery positive ( + ) terminal and ground.

|
| (7)
|
Measure the voltage between the rear high voltage battery negative ( - ) terminal and ground.

|
| 1) |
Check for insulation breakdown via KDS and physical leakage current before working on EV.
|
| 2) |
Remove the main fuse if insulation breakdown or leakage current is suspected. (Remove the
main fuse even when DTC CODE ON such as PRA malfunction)
(Refer to High Voltage Battery Control System - "Main
Fuse")
※ If there is no insulation breakdown or leakage current and it is normal, work without
removing the main fuse.
|
|
|
Service Inspection Mode
|
•
|
When working on the high voltage system, the work should be performed by technicians who have
completed the relevant training. A lack of understanding of the high voltage system can lead to
serious accidents due to electric shock or short circuit.
|
|
•
|
When working on the high voltage system or related components, be sure to observe and be aware of
the "Safety Precautions, Cautions and Warnings". If not, it may cause serious accidents due
to electric shock or short circuit.
|
|
•
|
When working on high voltage system, make sure to check the Personal Protective Equipment (PPE) and
high voltage shut-off procedure.
|
|
The service mode is used to safely perform actuation test or S/W Management related to the battery management
system while keeping the Main Relay OFF.
|
•
|
The acuation test with the KDS is possible in only the service mode.
|
|
•
|
In service mode, it is impossible to charge the high voltage battery and using the indoor/outdoor
V2L.
|
|
| 1. |
Enter the service mode as ordered below after stopping the vehicle and opening the driver's side door.
| (1)
|
Turn the POWER ON. (Do not EV READY.)
|
| (2)
|
Press the audio scroll on the right side of the steering wheel and maintain it.

|
| (3)
|
Input the trip scroll on the left side of the steering wheel 5 times to upward within 5 seconds.

|
All doors (including the hood and trunk) must be kept in a closed state, excluding the
driver's side door.
|
|
|
| 2. |
"Service Mode" lamp turns on in the Cluster when the vehicle is in servic inspection mode. Check
that the “Service Mode” lamp is turns on to ensure that service inspection mode is entered correctly.
Check that entering the service mode was normally done through the cluster.
Normal : The cluster's "Service Mode" lamp
turns on and turns off after about 3 seconds.
|
|
•
|
If the entering to the service mode fails, retry from 1 step.
|
|
•
|
It is impossible to change from the service mode to EV READY.
|
|
|
| 3. |
The service mode is deactivated when the POWER OFF.
|
Troubleshooting
Wind Noise
Suspected Causes
|
Repair
|
Door weatherstrip
|
Reassembly or replacement
|
Water Leaks
Suspected Causes
|
Repair
|
The seal of windshield and tailgate glass
|
Apply sealant
|
Mechanical Problem
Opening and Closing of hood, Tailgate
Suspected Causes
|
Repair
|
Engagement of hinge, striker or latch
|
Adjustment
|
The height of the overslam bumper
|
Adjustment
|
Opening and Closing of Door
Suspected Causes
|
Repair
|
Engagement of hinge, striker
|
Adjustment
|
Door handle, latch, checker
|
Replacement
|
Lack of grease of door hinge and checker
|
Apply grease
|
Window Glass
Suspected Causes
|
Repair
|
Assembly of positioning window glass
|
Adjustment
|
Motor or regulator
|
Replacement
|
Outside Handle
Suspected Causes
|
Repair
|
Outside handle does not deploy
|
Open the door with the inside handle to check that the outside handle deploys
- When deployed : Check the
door latch and previous step (FOB / BDC / PDC)
- When it is not deployed : Check the outside handle and
SBCM
|
Outside handle does not retract
|
Check by opening the door with the outside handle
- When the door is opened : Check the door latch and the
previous step (FOB / BDC / PDC)
- When the door is not opened: Check the outside handle and SBCM
|
Caught in the panel when deploying/retracting the outside handle
|
Reassembling the outside handle
|
|
Operating sequence : FOB → BDC → PDC → Door latch operation → SBCM → Outside handle
|
–
|
Door latch 'locked' state → Outside handle 'deployed'
|
|
–
|
Door latch 'unlocked' state → Outside handle 'retracted'
|
|
Tool Name / Number
|
Illustration
|
Description
|
Outside rear view mirror glass remover tool
0K876 - L2100
|

|
Used when removing outside rear view mirror glass
|
Outside view mirror assembly fixing stand
0K876 - C5100
|

|
Used when fixing the outside rear view mirror assembly
|