
Kia EV6: Motor and Reduction Gear System / Front Motor and Reduction Gear System
Kia EV6 (CV/CV1A) 2022-2026 Workshop Manual / Motor and Reduction Gear System / Front Motor and Reduction Gear System
Contents:
- Front Under Cover Removal and Installation
- Front Motor Cover Removal and Installation
- Front Motor and Reduction gear Mounting Components and Components Location
- Front Motor and Reduction gear Mounting Removal and Installation
- Front Motor and Reduction Gear Assembly Components and Components Location
- Front Motor and Reduction Gear Assembly Removal
- Front Motor and Reduction Gear Assembly Installation
- Front Motor and Reduction Gear Assembly On Vehicle Inspection
- Front Motor and Reduction Gear Oil Replacement
- Front Motor and Reduction Gear Oil Seal Replacement
Front Under Cover Removal and Installation
| Removal |
Front Under Cover
| 1. |
Remove the front under cover (A) after removing the fasteners and bolts.
|

Engine Room Under Rear Cover
When installing the lift jack, verify that the lift jack (A) and the front rear under cover (B) do not
interfere.
|


| 1. |
Remove the engine room under rear cover (A) after removing the fasteners, nuts and bolts.
|

| Installation |
Front Under Cover
| 1. |
Install in the reverse order of removal.
|
Engine Room Under Rear Cover
| 1. |
Install in the reverse order of removal.
|
Front Motor Cover Removal and Installation
| Removal |
|

Front Motor Front Cover
| 1. |
Shut off the high voltage circuit.
(Refer to Motor and Reduction Gear System - "High Voltage Shut-off
Procedures")
|
| 2. |
Remove the front trunk.
(Refer to Body - "Front Trunk")
|
| 3. |
Drain the coolant.
(Refer to Electric Vehicle Cooling System - "Coolant")
|
| 4. |
Remove the motor & reduction gear oil cooler.
(Refer to Cooling System - "Motor & Reduction Gear Oil
Cooler")
|
| 5. |
Remove the coolant distribution pipe.
(Refer to Cooling System - "Coolant Distribution Pipe")
|
| 6. |
Remove the front motor front cover (A) after removing the fasteners.
|

Front Motor Side Cover
| 1. |
Shut off the high voltage circuit.
(Refer to Motor and Reduction Gear System - "High Voltage Shut-off
Procedures")
|
| 2. |
Remove the front trunk.
(Refer to Body - "Front Trunk")
|
| 3. |
Remove the front motor side cover (A) after removing the fasteners.
|

Front Reduction Gear Front Cover
| 1. |
Shut off the high voltage circuit.
(Refer to Motor and Reduction Gear System - "High Voltage Shut-off
Procedures")
|
| 2. |
Remove the front trunk.
(Refer to Body - "Front Trunk")
|
| 3. |
Remove the electric A/C compressor.
(Refer to Heating,Ventilation And Air Conditioning - "Electric A/C
Compressor")
|
| 4. |
Remove the front reduction gear front cover (A) after removing the fasteners.
|

Front Motor Rear Cover 1
| 1. |
Remove the front under cover.
(Refer to Front Motor and Reduction Gear System - "Front Under
Cover")
|
| 2. |
Remove the front motor rear cover 1 (A) after removing the fasteners.
|

Front Motor Rear Cover 2
| 1. |
Shut off the high voltage circuit.
(Refer to Motor and Reduction Gear System - "High Voltage Shut-off
Procedures")
|
| 2. |
Remove the front trunk.
(Refer to Body - "Front Trunk")
|
| 3. |
Remove the front under cover.
(Refer to Front Motor and Reduction Gear System - "Front Under
Cover")
|
| 4. |
Drain the coolant.
(Refer to Electric Vehicle Cooling System - "Coolant")
|
| 5. |
Remove the battery heater.
(Refer to Cooling System - "Battery Heater")
|
| 6. |
Remove the wiring mounting bolt (A).
|

| 7. |
Remove the front motor rear cover 2 (A) after removing the fasteners.
|

| Installation |
Front Motor Front Cover
| 1. |
Install in the reverse order of removal.
|
Front Motor Side Cover
| 1. |
Install in the reverse order of removal.
|
Front Reduction Gear Front Cover
| 1. |
Install in the reverse order of removal.
|
Front Motor Rear Cover 1
| 1. |
Install in the reverse order of removal.
|
Front Motor Rear Cover 2
| 1. |
Install in the reverse order of removal.
|
Front Motor and Reduction gear Mounting Components and Components Location
| Components and Components Location |

| 1. LH Motor Mounting Bracket 1-a. 107.9 - 127.5 N·m (11.0 - 13.0 kgf·m, 79.6 - 94.0 lb·ft) 1-b. 63.7 - 83.4 N·m (6.5 - 8.5 kgf·m, 47.0 - 61.5 lb·ft) 2. RH Motor Mounting Bracket 2-a. 107.9 - 127.5 N·m (11.0 - 13.0 kgf·m, 79.6 - 94.0 lb·ft) 2-b. 63.7 - 83.4 N·m (6.5 - 8.5 kgf·m, 47.0 - 61.5 lb·ft) |
3. RR Motor Mounting Bracket 3-a. 107.9 - 127.5 N·m (11.0 - 13.0 kgf·m, 79.6 - 94.0 lb·ft) 3-b. 63.7 - 83.4 N·m (6.5 - 8.5 kgf·m, 47.0 - 61.5 lb·ft) |
Front Motor and Reduction gear Mounting Removal and Installation
| Special Service Tool |
|
Tool Name / Number |
Illustration |
Description |
|
Engine fixture (adapter) 09200 - 4X000 |
|
Used for anchoring the motor and reducer gear when removing and installing the motor and reducer gear |

| Removal |
LH Motor Mounting Bracket
| 1. |
Remove the front motor and reduction gear assembly.
(Refer to Front Motor and Reduction Gear System - "Front Motor and
Reduction Gear Assembly")
|
| 2. |
Support the motor and reduction gear assembly using engine cranes and SST (09200 - 4X000).
|


| 3. |
Remove the motor mounting bracket bolts and nuts (A).
|

| 4. |
Remove the front motor and reduction gear assembly from the front subframe by lifting the engine crane
upwards.
|
| 5. |
Remove the LH motor mounting bracket (A) after removing the mounting bolts.
|

RH Motor Mounting Bracket
| 1. |
Remove the front motor and reduction gear assembly.
(Refer to Front Motor and Reduction Gear System - "Front Motor and
Reduction Gear Assembly")
|
| 2. |
Support the motor and reduction gear assembly using engine cranes and SST (09200 - 4X000).
|
| 3. |
Remove the RH motor mounting bracket bolt and nut (A).
|

| 4. |
Remove the RH motor mounting bracket (A) after removing the mounting bolts.
|

RR Motor Mounting Bracket
| 1. |
Remove the front motor and reduction gear assembly.
(Refer to Front Motor and Reduction Gear System - "Front Motor and
Reduction Gear Assembly")
|
| 2. |
Support the motor and reduction gear assembly using engine cranes and SST (09200 - 4X000).
|
| 3. |
Remove the RR motor mounting bolt and nut (A).
|

| 4. |
Remove the RR motor mounting bracket (A) after removing the mounting bolts.
|

| Installation |
LH Motor Mounting Bracket
| 1. |
Install in the reverse order of removal.
|
RH Motor Mounting Bracket
| 1. |
Install in the reverse order of removal.
|
RR Motor Mounting Bracket
| 1. |
Install in the reverse order of removal.
|
Front Motor and Reduction Gear Assembly Components and Components Location
| Components and Components Location |

| 1. Motor & Reduction Gear Oil Cooler 1-a. 6.9 - 9.8 N·m (0.7 - 1.0 kgf·m, 5.1 - 7.2 lb·ft) 2. Coolant Distribution Pipe 2-a. 16.7 - 23.5 N·m (2.0 - 2.4 kgf·m, 14.5 - 17.3 lb·ft) 3. Front Motor Front Cover 4. Electronic Oil Pump (EOP) 4-a. 19.6 - 26.5 N·m (2.0 - 2.7 kgf·m, 14.5 - 19.5 lb·ft) 5. O-ring 6. LH motor Mounting Bracket 6-a. 63.7 - 83.4 N·m (6.5 - 8.5 kgf·m, 47 - 61.5 lb·ft) 7. Motor Side Mounting Bracket 7-a. 60.8 - 80.4 N·m (6.2 - 8.2 kgf·m, 44.8 - 59.3 lb·ft) 8. Motor Position and Temperature Sensor 8-a. 9.8 - 11.8 N·m (1.0 - 1.2 kgf·m, 7.2 - 8.7 lb·ft) 9. Front Motor Side Cover |
10. Disconnect Actuator System (DAS) Motor 10-a. 4.9 - 5.9 N·m (0.5 - 0.6 kgf·m, 3.6 - 4.3 lb·ft, 43.4 - 52.1 lb·in) 11. O-ring 12. Oil Temperature Sensor 12-a. 9.8 - 11.8 N·m (1.0 - 1.2 kgf·m, 7.2 - 8.7 lb·ft) 13. Tube Pipe 13-a. 9.8 - 11.8 N·m (1.0 - 1.2 kgf·m, 7.2 - 8.7 lb·ft) 13-b. 41.2 - 47.1 N·m (4.2 - 4.8 kgf·m, 30.4 - 34.7 lb·ft) 14. Tube Pipe Washer 15. RR Motor Mounting Bracket 15-a. 63.7 - 83.4 N·m (6.5 - 8.5 kgf·m, 47.0 - 61.5 lb·ft) 16. Front Motor Rear Cover 2 17. Front Motor Rear Cover 1 18. Inverter Assembly 18-a. 3.9 - 5.9 N·m (0.4 - 0.6 kgf·m, 2.9 - 4.3 lb·ft, 34.7 - 52.1 lb·in) 19. Inverter Assembly Gasket 20. Front Motor and Reduction Gear Assembly |
Front Motor and Reduction Gear Assembly Removal ➤
Front Motor and Reduction Gear Assembly Installation
| Installation |
| 1. |
Install in the reverse order of removal.
|


| 2. |
Fill with coolant.
(Refer to Electric Vehicle Cooling System - "Coolant")
|
| 3. |
Refill the front motor and reduction gear oil.
(Refer to Front Motor and Reduction Gear System - "Front Motor and
Reduction Gear Oil")
|
| 4. |
After installing the front motor and reduction gear assembly, perform the leakage test.
(Refer to Battery Control System - "Air Tightness")
|
| 5. |
Perform the "Motor Control Unit-Front" and "Initialization of Automatic Resolver Offset
Calibration" using the KDS.
(Refer to Motor and Reduction Gear System - Motor Position &
Temperature Sensor)
|
Front Motor and Reduction Gear Assembly On Vehicle Inspection
| Inspection |
[Phase Resistance]
| 1. |
Remove the front high voltage junction box.
(Refer to Battery Control System - "Front High Voltage Junction
Box")
|
| 2. |
Remove the inverter assembly.
(Refer to Battery Control System - "Inverter Assembly -
4WD")
|
| 3. |
Check the resistance of each line (U, V, W) using a milliohm meter.
|

[Insulation Resistance]
| 1. |
Remove the front high voltage junction box.
(Refer to Battery Control System - "Front High Voltage Junction
Box")
|
| 2. |
Remove the inverter assembly.
(Refer to Battery Control System - "Inverter Assembly -
4WD")
|
| 3. |
Check insulation resistance using an insulation resistance tester.
|
[Dielectric Strength]
| 1. |
Remove the front high voltage junction box.
(Refer to Battery Control System - "Front High Voltage Junction
Box")
|
| 2. |
Remove the inverter assembly.
(Refer to Battery Control System - "Inverter Assembly -
4WD")
|
| 3. |
Check leakage current Using a withstanding voltage tester.
|
Front Motor and Reduction Gear Oil Replacement
| Replacement |
|
When checking the reduction gear oil level, be careful not to allow foreign substance (like dust) to enter
through the filler hole.
|
| 1. |
Remove the front under cover.
(Refer to Front Motor and Reduction Gear System - "Front Under
Cover")
|
| 2. |
Prepare a clean 5 ℓ beaker (A) to measure the amount of oil.
|

| 3. |
Remove the drain plug (A) and drain oil, and then reinstall the drain plug.
|


| 4. |
Remove the front reduction gear cover fastener (A).
|

| 5. |
Remove the filler plug (A).
|

| 6. |
Fill the specified oil through the filler plug hole as much as it has been drained.
|
| 7. |
Install the filler plug (A).
|
| 8. |
Install the front reduction gear cover fastener (A).
|
| 9. |
Install the front under cover.
(Refer to Front Motor and Reduction Gear System - "Front Under
Cover")
|
Front Motor and Reduction Gear Oil Seal Replacement
| Special Service Tool |
|
Tool Name / Number |
Illustration |
Description |
|
Reduction gear oil seal installer 09445 - GI100 |
|
Installation of the oil seal on the Front reduction gear case and housing (Used with the handle) |
|
Handle 09231 - H1100 |
|
Used with the oil seal installer |


| Replacement |
|
| 1. |
Drain the front motor and reduction gear oil.
(Refer to Front Motor and Reduction Gear System - "Front Motor and
Reduction Gear Oil")
|
| 2. |
Remove the front driveshaft assembly.
(Refer to Driveshaft Assembly - "Front Driveshaft")
|
| 3. |
Remove the oil seal (A).
Case side
Housing side
|


| 4. |
When installing a new oil seal, use the SST (09445 - GI100, 09231 - H1100).
Case side
Housing side
|


| 5. |
Install the front driveshaft assembly.
(Refer to Driveshaft Assembly - "Front Driveshaft")
|
| 6. |
Refill the front motor and reduction gear oil.
(Refer to Front Motor and Reduction Gear System - "Front Motor and
Reduction Gear Oil")
|


Other information:
Kia EV6 (CV/CV1A) 2022-2026 Workshop Manual: Front Motor and Reduction Gear Assembly Removal
Special Service Tool Tool Name / Number Illustration Description Engine fixture (adapter)09200 - 4X000 Used for anchoring the motor and reducer gear when removing and installing the motor and reducer gear Removal • When working on high voltage system, the work should be performed by technicians who have completed the relevant training.Towing Service Wheel dollies If the Kia EV6 requires towing, the procedure should be performed by an authorized Kia dealer or a professional towing service equipped to handle electric vehicles. Following the correct lifting and transportation procedures is essential to prevent damage to the electric powertrain, suspension, battery system, and drivetrain components.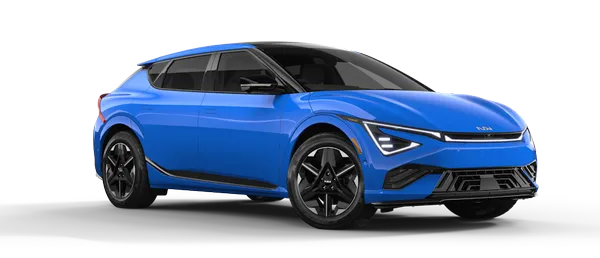
Contents
- Front Under Cover Removal and Installation
- Front Motor Cover Removal and Installation
- Front Motor and Reduction gear Mounting Components and Components Location
- Front Motor and Reduction gear Mounting Removal and Installation
- Front Motor and Reduction Gear Assembly Components and Components Location
- Front Motor and Reduction Gear Assembly Removal
- Front Motor and Reduction Gear Assembly Installation
- Front Motor and Reduction Gear Assembly On Vehicle Inspection
- Front Motor and Reduction Gear Oil Replacement
- Front Motor and Reduction Gear Oil Seal Replacement
Categories
- Manuals Home
- Kia EV6 Owners Manual
- Kia EV6 Service Manual
- Questions & Answers
- Video Guides
- Useful Resources
- New on site
- Most important about Kia EV6
- Privacy Policy

Copyright © 2026 Kia EV6 Manuals ⏱ 0.025